Although the weather shifts between seasons aren’t as dramatic in Texas as they are in other parts of the country, you still need to rotate seasonal clothing for your family, put away winter holiday decorations, and much more. While you know that spring cleaning is necessary, it’s also a big job. Here’s our spring cleaning tips checklist.
All at Once or a Little at a Time?
Before you tackle your spring cleaning job, assess how much time you have to devote to the project. If you have an entire weekend free and you can get other family members to help, you can get the job done quickly. If not, it’s still possible to finish your spring cleaning before the season gets too far underway. You just need to set aside a few hours each week and tackle one area at a time.
1. Cleaning The Kitchen
While the kitchen can be the most time consuming, its usually the biggest priority. We recommend starting with the kitchen first to make sure you remove any bacteria or mold building up that could be contaminating your food. In the kitchen, you should start by removing unnecessary items and putting them into storage boxes, helping to declutter your home. After you’re done, you should begin cleaning each of the following items:
- Counter Tops – Wipe down with cleaner
- Cabinets – Take out all items and clean inside
- Drawers – Take out items and clean, then reorganize into containers.
- Pantry – Remove food and spices and put into categories. Clean shelves and put items back in based on your category assortment.
- Oven – Clean the inside of the oven with oven cleaner, remove and clean stove burners, wipe down range hood and clean the filter.
- Refrigerator & Freezer – Throw away all old items. Then start with the freezer and remove all food and wipe down the inside. Replace the food inside the freezer. Repeat the same steps with the fridge.
- Sink – use a drain cleaner to remove build up in your pipes. Clean out your garbage disposal, and wipe down the sing with cleaner.
- Dishwasher – Remove drawers from the dishwasher and clean the inside. Clean each item and return inside.
- Appliances – Clean and reorganize any appliances.
2. Bathroom Clean Up
Once you’ve scrubbed down your kitchen, you likely have a lot of the supplies out that you’ll also need for your bathroom. Go ahead and get the dirty work out of the way, and clean the bathroom next. While not as extensive as the kitchen, bacteria and mold can still build up in the bathroom, so it’s important to clean the bathroom with detail to keep germs and smells away. Below is a list of bathroom cleaning tasks:
- Showerhead – remove the shower head and clean out the build-up from inside your sprayer.
- Bathtub – clean the drain and walls and remove any mold.
- Sink – remove build up with a drain cleaner, use a toothbrush to clean around the faucet.
- Drawers – remove all items from drawers, throw away old items, and replace toothbrush with a new one. Reorganize using containers.
- Toilet – shut the water valve and flush the toilet to remove all water, scrub the walls of the toilet bowl and the water tank. Turn the water valve back on when complete.
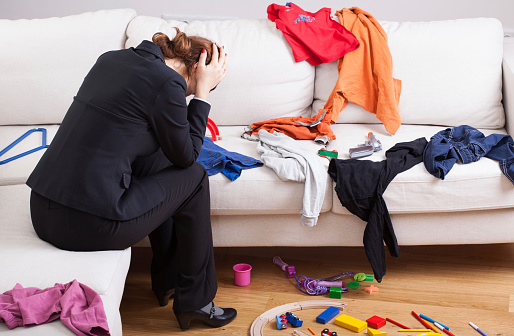
3. Living Room Cleaning
Cleaning the living room is often the first room people think of when doing their spring cleaning. Its often the room most commonly used, and you want to impress anyone visiting with a clean and tidy space. The list below details items to clean in the living room:
- Windows – clean and dust blinds and wash the windows with cleaners.
- Shelves – remove items and clean the shelves, then reorganize the items back onto the shelves
- Carpet – use a carpet cleaner to clean the carpet
- Walls – clean all walls and any hanging decor
- Baseboards – scrub the baseboards along the edges of each room.
- Couches and Chairs – Remove cushions and use a vacuum to clean up dust and anything else left behind.
4. Cleaning Your Laundry Room
The Laundry room often is overlooked during spring cleaning, but be sure to clean the washer to keep your clothes smelling good, and the dryer to prevent fires in your home.
Washer- Clean the inside of your washer, the mold build up is common, so be sure to pull back and liners you can to get in between the cracks. Dryer – be sure to remove any lent from the dryer, and use a brush to get into the small crevices to prevent a fire due to lint build up. Floors & Walls – If possible, pull your washer and dryer out to clean back behind the appliances.
5. Bedroom Clean Up
Once you’ve gotten to the bedroom, the hardest parts are out of the way. Be sure to clean the walls, baseboards, floors, and windows just like any other room. Here are the main items to clean in the bedroom:
- Bed – Remove and wash all linens and pillows, and clean your mattress using baking soda.
- Closet – put any old clothes into a storage box and reorganize your hang-ups as you see fit.
- Chest of Drawers – take out all items and clean the inside of the drawers. If your furniture is old, it might be worth purchasing scented liners to get rid of the musty smell of your clothes. Return items back into your drawers when complete.
6. Decluttering
Here’s what we recommend:
- Go through each room in your home and decide what you can donate to charity, what needs to go in the garbage, and what you need to recycle. If you have limited free time, just focus on getting one room done per day. It will give you a great sense of accomplishment at the end of the week when you bring all of the bags to their respective places.
- Clean each closet and only put back what you need to use in the spring and summer. By putting the rest into storage units, you will be able to easily access the things you need for the proper season.
- Next, spend some time decluttering the common living areas. Separate what you find into boxes and decide what is and isn’t worth keeping and then decide what to donate, recycle, throw away, or put into storage. You may find that you have many sentimental items you want to hold onto that take up a lot of space. Self-storage is perfect for this situation and Big Tex has a range of perfect storage options to match your needs in Houston and The Woodlands.
How Much Storage Space Do You Need?
Cleaning and purging might be a lot of work, but it feels great to have an organized home. After identifying several items for self-storage, you may need storage space.
A 10 x 10 storage unit provides you with 100 square feet of space and is our most popular option. This is the approximate equivalent of half of a one-car garage and will hold outdoor equipment, some furniture, mattresses, and approximately 12-15 boxes full of supplies. To decide if this is enough space for you, walk out to your own garage and visualize if everything you want to put into storage would fit into half of it.
If 10 x 10 isn’t large enough, consider 10 x 20 storage space. This is equivalent in size to a full one-car garage and will hold items such as large appliances, furniture, and business filing cabinets.
We also have several other options available ranging from 5 x 5 to 10 x 30.
If you need help determining which one is best for your needs, don’t hesitate to ask.